Getting Started on C Course
Overview
The following steps will walk you through the setup for C projects:
Pre Requisites
- 1)Install Git from http://git-scm.com/downloads
-
2)Allow the installer to add git.exe to your PATH environment variable.(Select second option while installing )
- 3) After installation is successful open a new command prompt and type "git". You should see git usage commands.If any error message comes you need to Add git to the path manually. [Step 4]
-
4)To configure the paths manually, add <InstallationDir>/Git/bin , and <InstallationDir>/Git/cmd to the PATH environment variable.
- 5)Signup for a github account at: http://github.com/ if you dont have a github account
- 6)Install Visual Studio Express 2013 for Windows Desktop. Installer Links are Below .
- 7)Install project tracker tool by downloading it from below links (Use 64bit installer if yours is a 64bit system, 32bit otherwise)
- 8)If you think your system is already used by some seniour for running project tracker tool last year, Delete the .MissionRnD and MissionRnDProjects Folders you will find in C:/Users/your_username/ directory. Only install tool after you delete it, or else re install.
- 9)Make sure the Google Drive Folder we shared for C course is synced currently before submitting any lesson, Basically there should be a folder existing in this format ol__c_college_ in your Users\User\Google Drive Folder.
Must watch Tutorials (Watch in order):
Project Tracker Tool Setup
Install project tracker tool. Version 3.4.0
- Project Tracker Tool 64 bit Installer
- Project Tracker Tool 32 bit Installer
Getting Started with the Tool
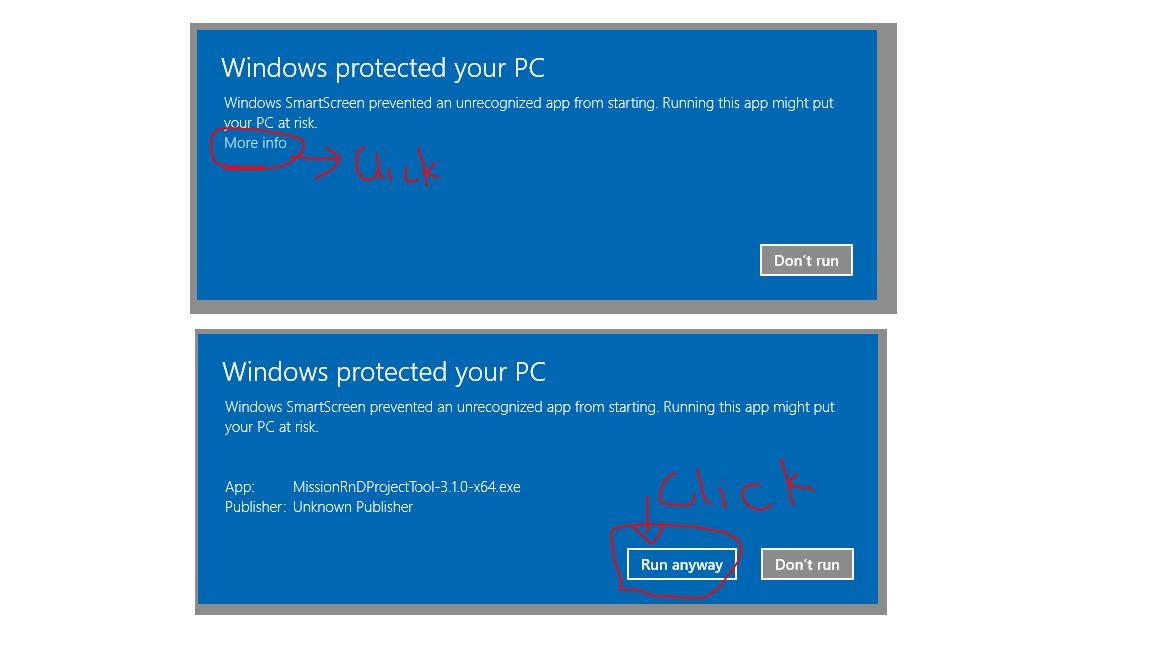
- If you face a Windows Protected Your PC Error during installation, Click on MoreInfo and click RunAnyway.
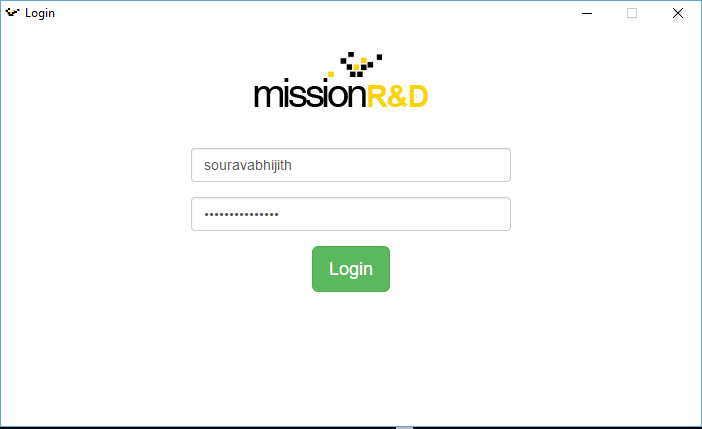
- For every launch, github username and password have to be provided to the tool configuration settings.
- Click on Configure Git and Github ,to configure properly (Make sure ,ssh is added in ENV_PATH)
- Following launch screen will appear once the tool is configured with required github credentials.

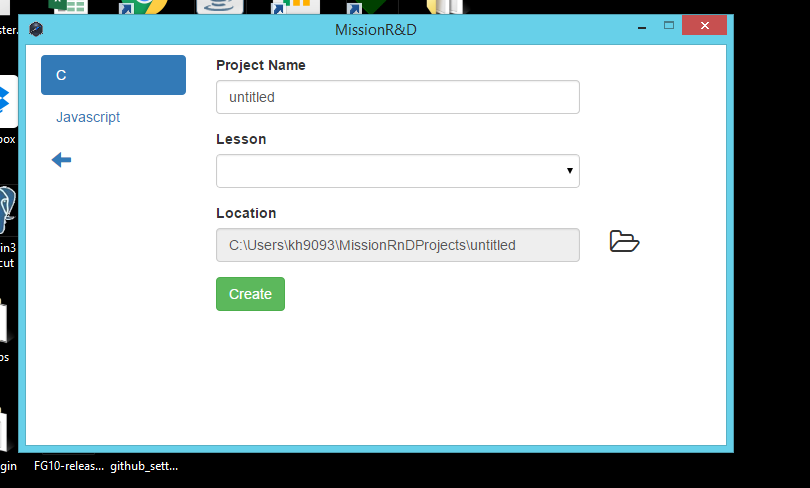
- Click on create new project and select the project that you want to start working with. Lesson is a dropdown list which will contain all lessons released. Project Name is the the folder name with which you want to create that lesson locally

- The project home screen shows the activities that are completed and the activities that haven't been completed. It has the options to test and submit your code.
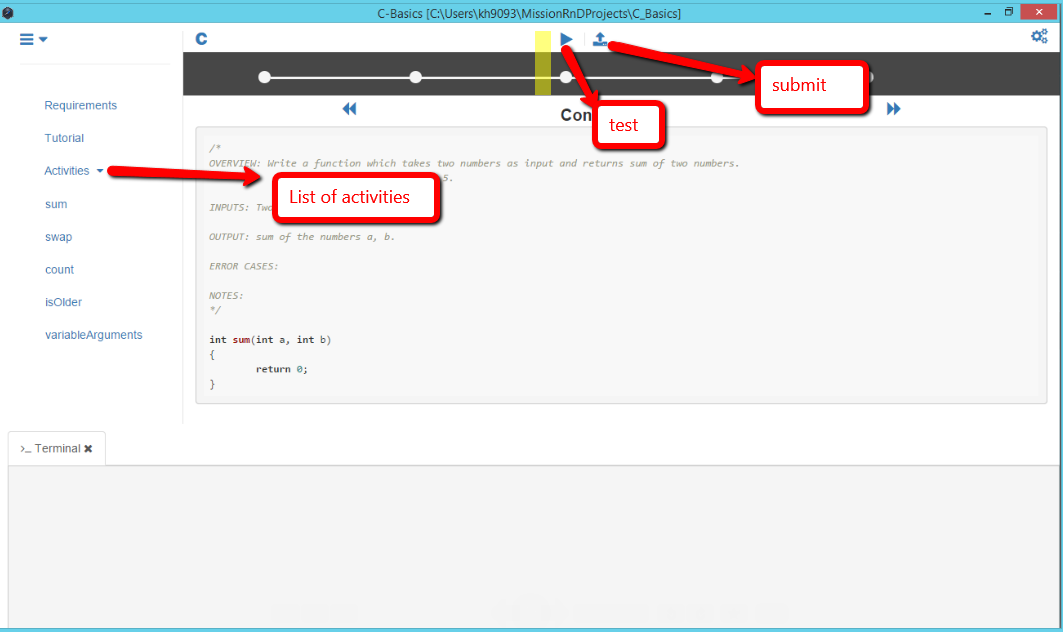
- Click on File-OpenProject and Open the .sln file of the lesson in Microsoft visual studio 2013 and start completing activities in the required order.
- You can run All tests from Visual studio itself ,From Test->Run->AllTests .You can view the Test cases which failed here.Once you passed all test cases for a particular question or all testcases ,You can start Test and submit from the tool. You need to again click on Test and submit for each question from tool, Otherwise your progress wont be
Graded on our end
- Complete the assignments by coding the activities in the project directory. Each project is broken into a set of activities. Once you have coded an activity, you can verify if your code is correct by running predefined test cases. The pre-defined tests are under the spec folder.
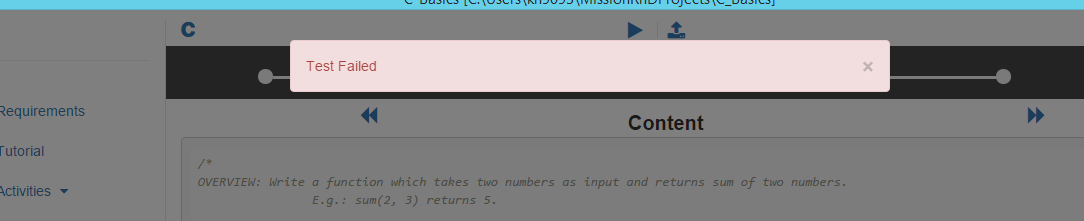
Tests Failed
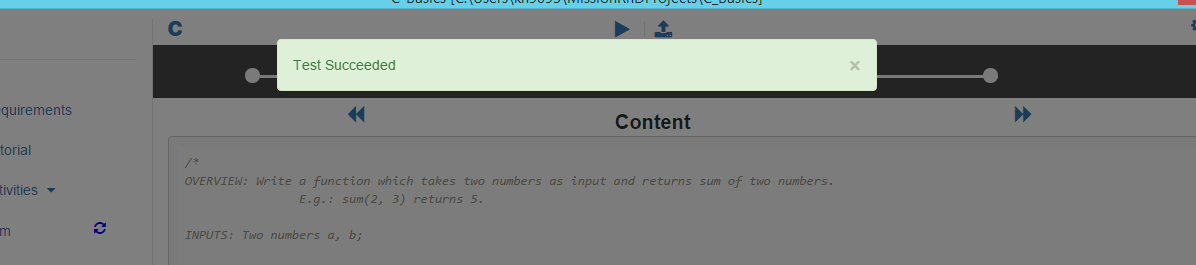
Tests Passed
- Once tests gets passed, You need to Submit the Code to us by Clicking on Submit button.This will copy your current Project CPP files into Drive directory

Steps to run Tests in visual studio , Follow these steps after you installed Project Tracker Tool .
- Open Visual studio 2013 after installation is successful
- Select FILE --> Open Project. Choose .sln file of the project you just donwloaded from tool .
- You will see spec and src projects. spec project contains all test files and src project contains all source files.
- Now run tests from TEST --> Run --> All Tests. You will see test results on left pane.
- If you want to debug any test, keep a breakpoint in the file you want to debug and run test from TEST --> Debug --> All Tests.