This project introduces you to android development and developing simple apps on android.
None.
Follow the Getting Started on Android document to get your environment up and running for developing Android apps.
An android app has the following key components:
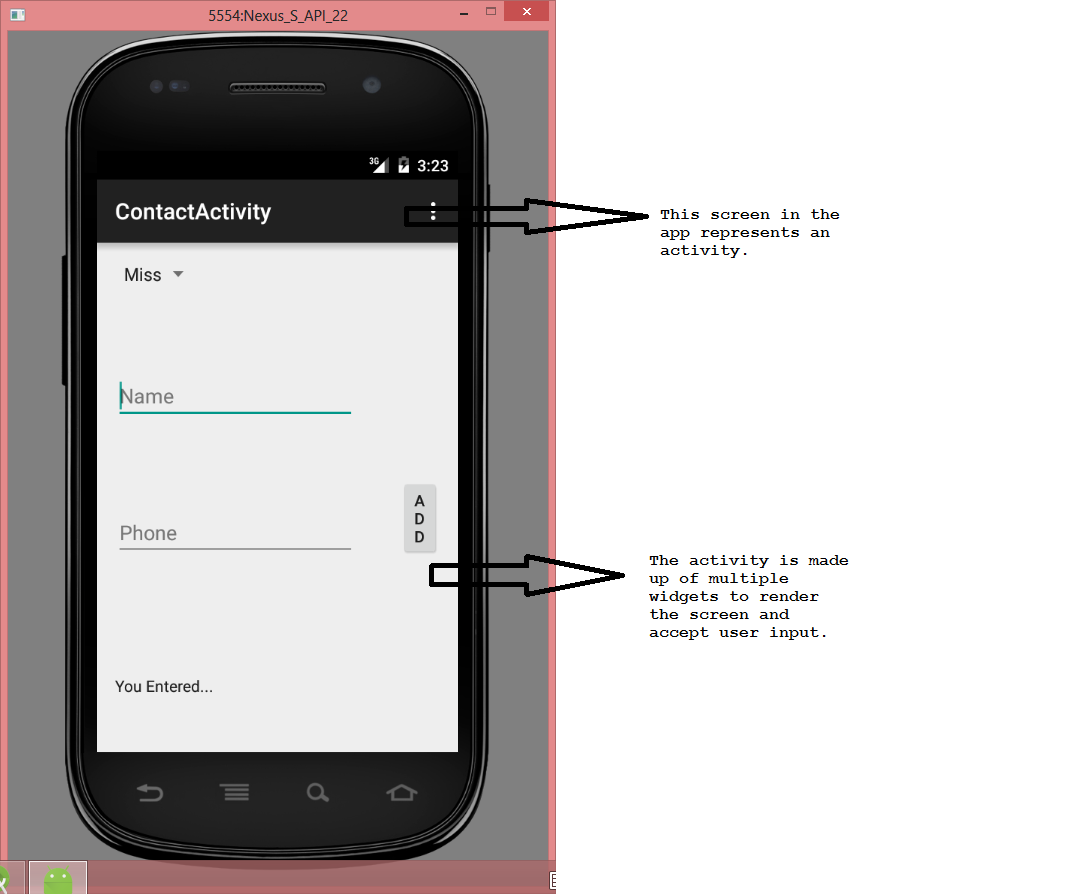
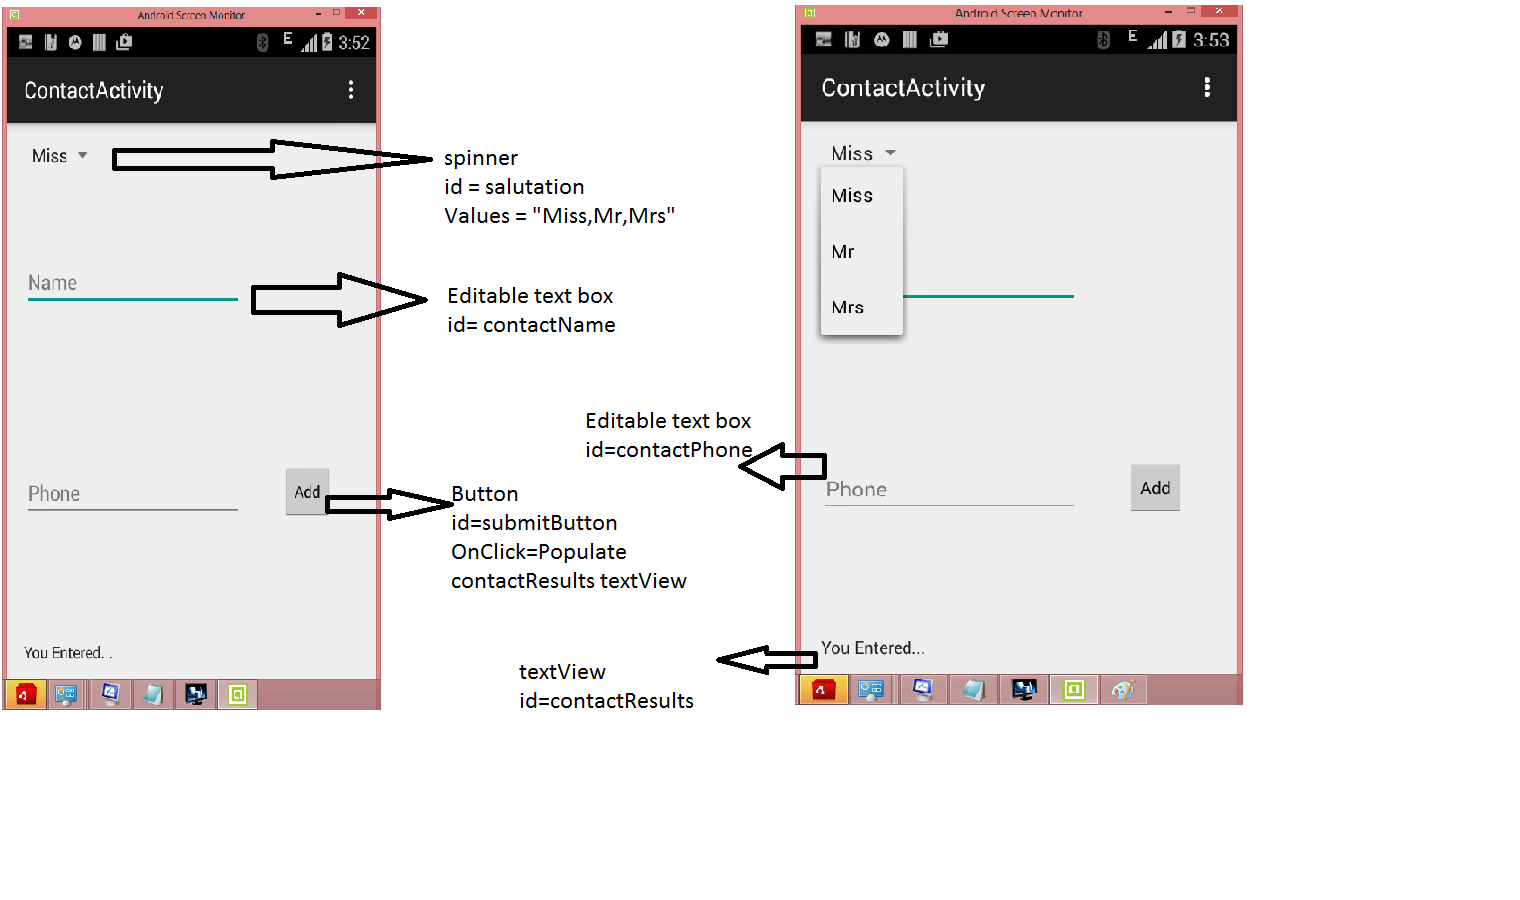
An app will have many UI screens. Each UI screen is implemented as an activity. The activity in turn uses many widgets (textbox, calendar, listview widgets) to render the UI as well as accept user inputs. The screenshot below is from an app you will be developing during the project.
The screen shows a form for capturing contact details (Salutation, Name, Phone etc). This screen will be implemented as an activity. The activity in turn will make use of many widgets (Spinner, textbox, buttons etc) to render the screen as well as take inputs from the user.
There are 2 key files associated with each android activity: Layout files and code-behind implementation files.
When an activity instance is created, it uses the setContentView() android API to load/access all the widgets associated with that specific layout file.
You use intents to navigate from 1 screen (or activity) to another screen (or activity).
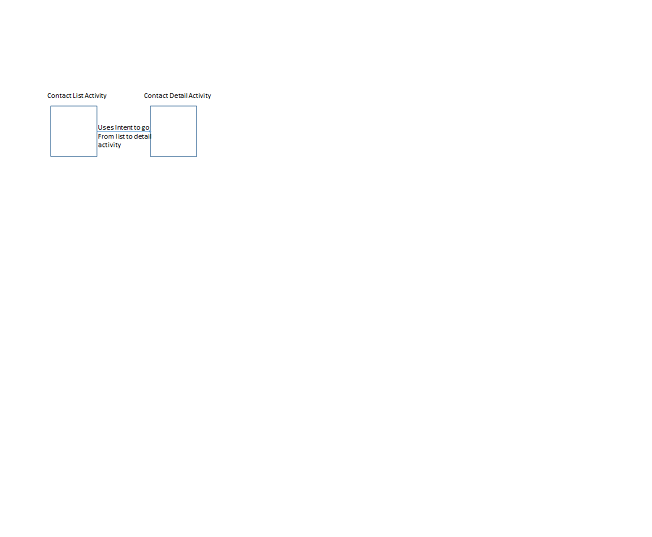
For example: if you want to navigate from a contact list screen and to a screen that shows full details of that contact, you implement an Intent to do the navigation and passing data to the ContactDetail activity.
Every android app has 1 app manifest file. This file is the androidmanifest.xml file located under app\src\main\AndroidManifest.xml - Open up the androidmanifest.xml file for your project. In it, you will find all the activities that are part of that project. Lets look at details for the ContactActivity listed in this file...
A few key aspects to pay attention to:
1) android:name is used to identify the Java class that implements the activity. You can read more about this attribute at the Android docs website.
2) The Launcher intent specifies that a launch icon be created for this activity and placed in the launcher screen.
This is enough to get started. There are quite a few other components such as Services (background tasks etc) which we will introduce at later stages.
Here is a tutorial you can follow along to build your first android app. You will find activity_tutorial.xml and Tutorial.java files in your project that you can use.
In this tutorial, we will build an app with a simple screen as follows:
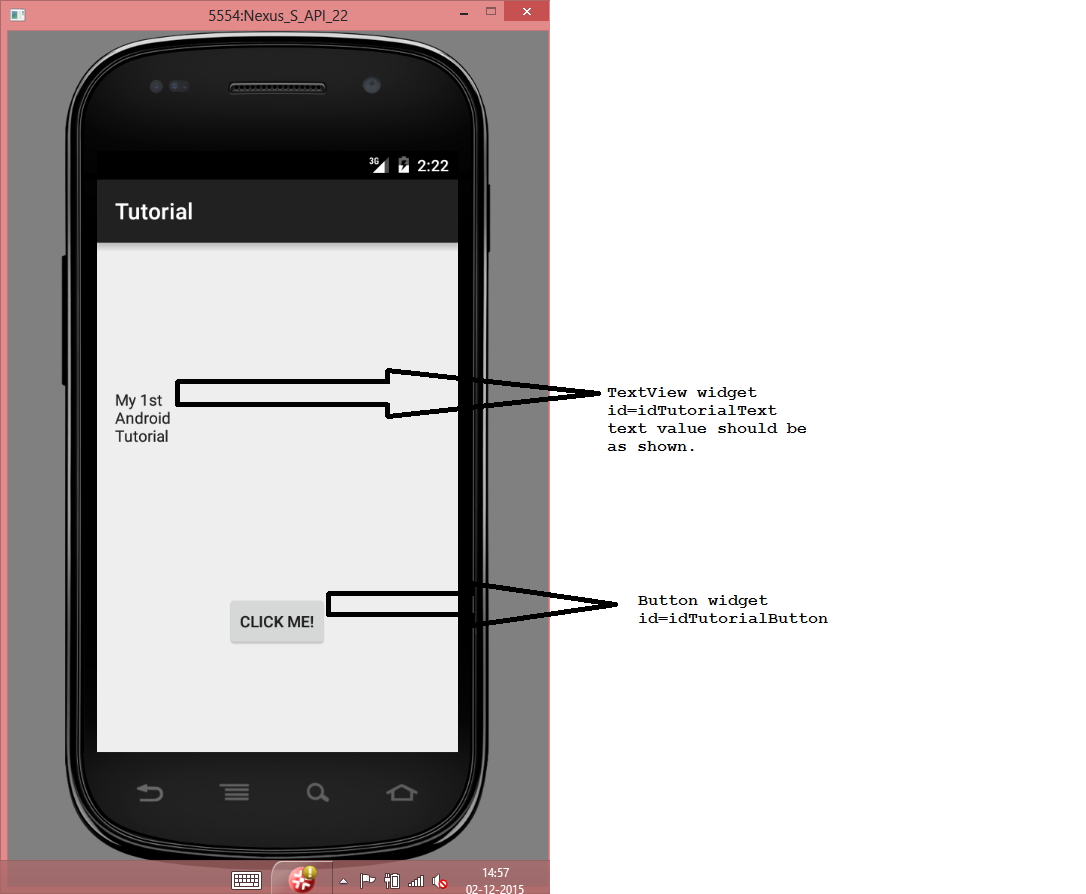
Do the following to build the above screen:
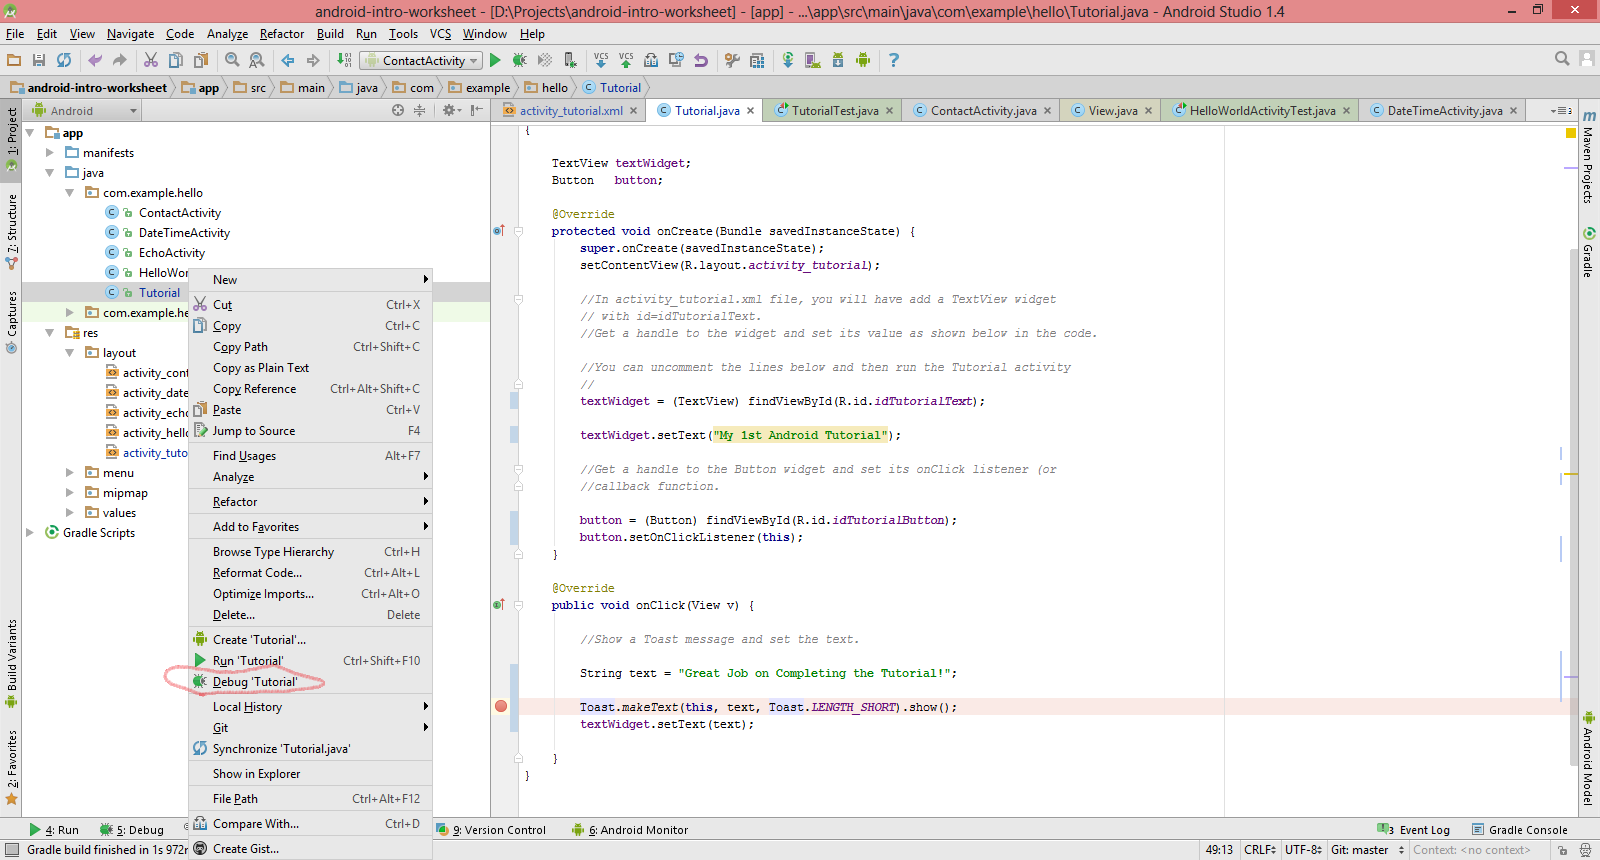
Now, open the Tutorial.java file and start implementing the activity. First, we need to set the textView widget's text property. This can be done as follows:
Next, we need to implement a handler that will show a toast message every time a user clicks the button. For this, we first need to register the onClick listener for the button. You can do this registration
by calling the setOnClickListener() method as part of the onCreate() method of the activity.
Then, in the onClick() method, call Toast.MakeToast() method to show the message as given below:
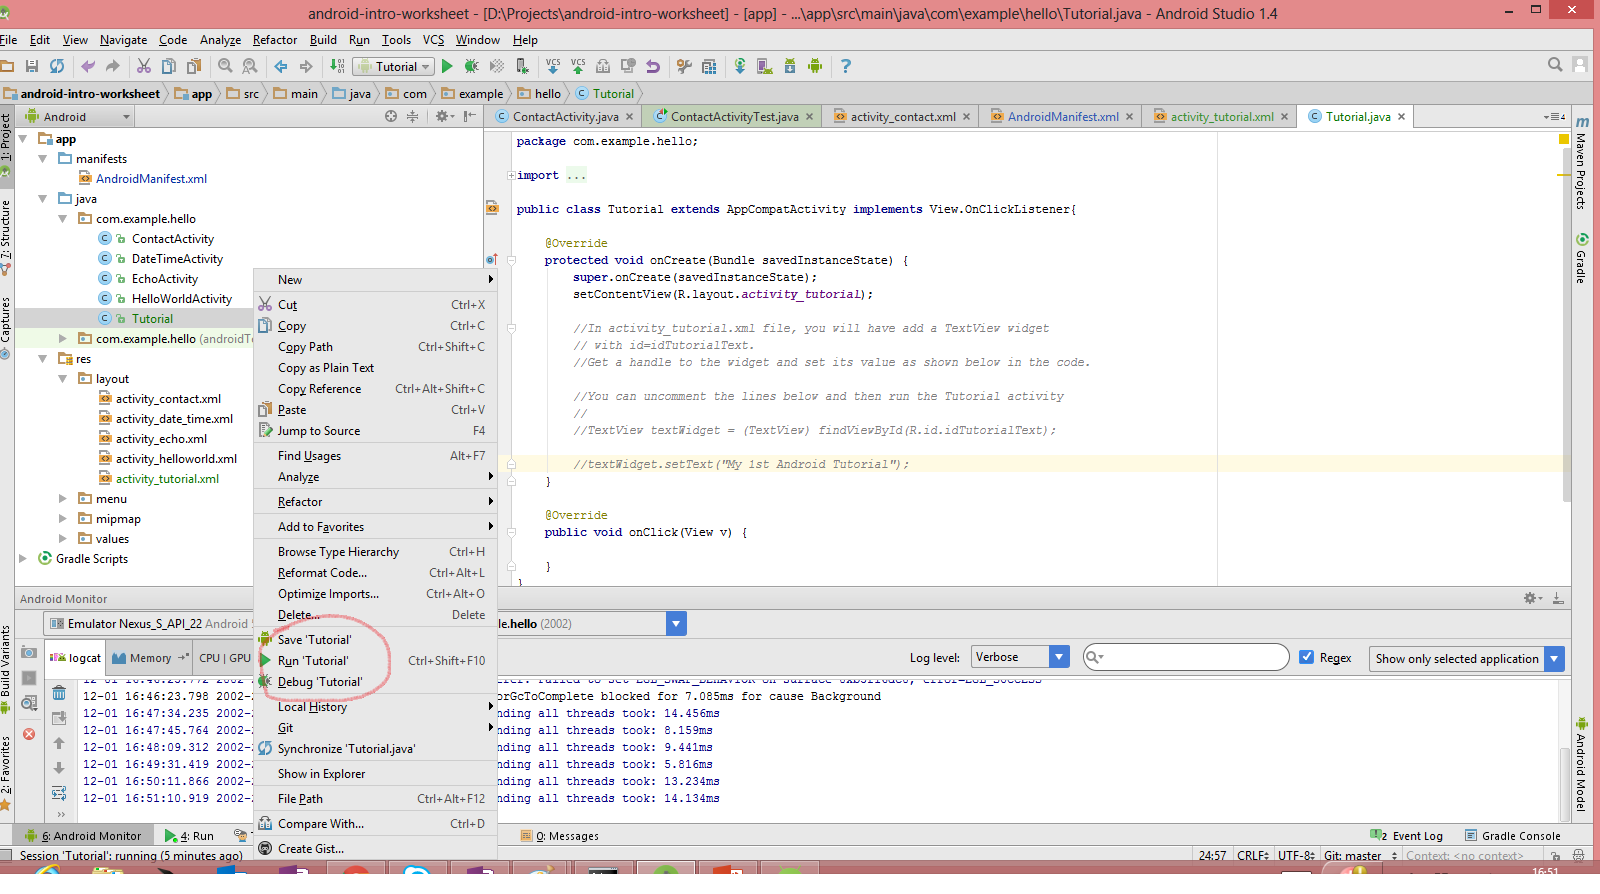
Now, you are ready to run the tutorial. In Android studio, right click on the Tutorial.java file and select the Run Tutorial option.
You can debug your activity code (or test case code) by first setting a breakpoint in your code and then right-click on the activity/test case and select the Debug option as shown below.
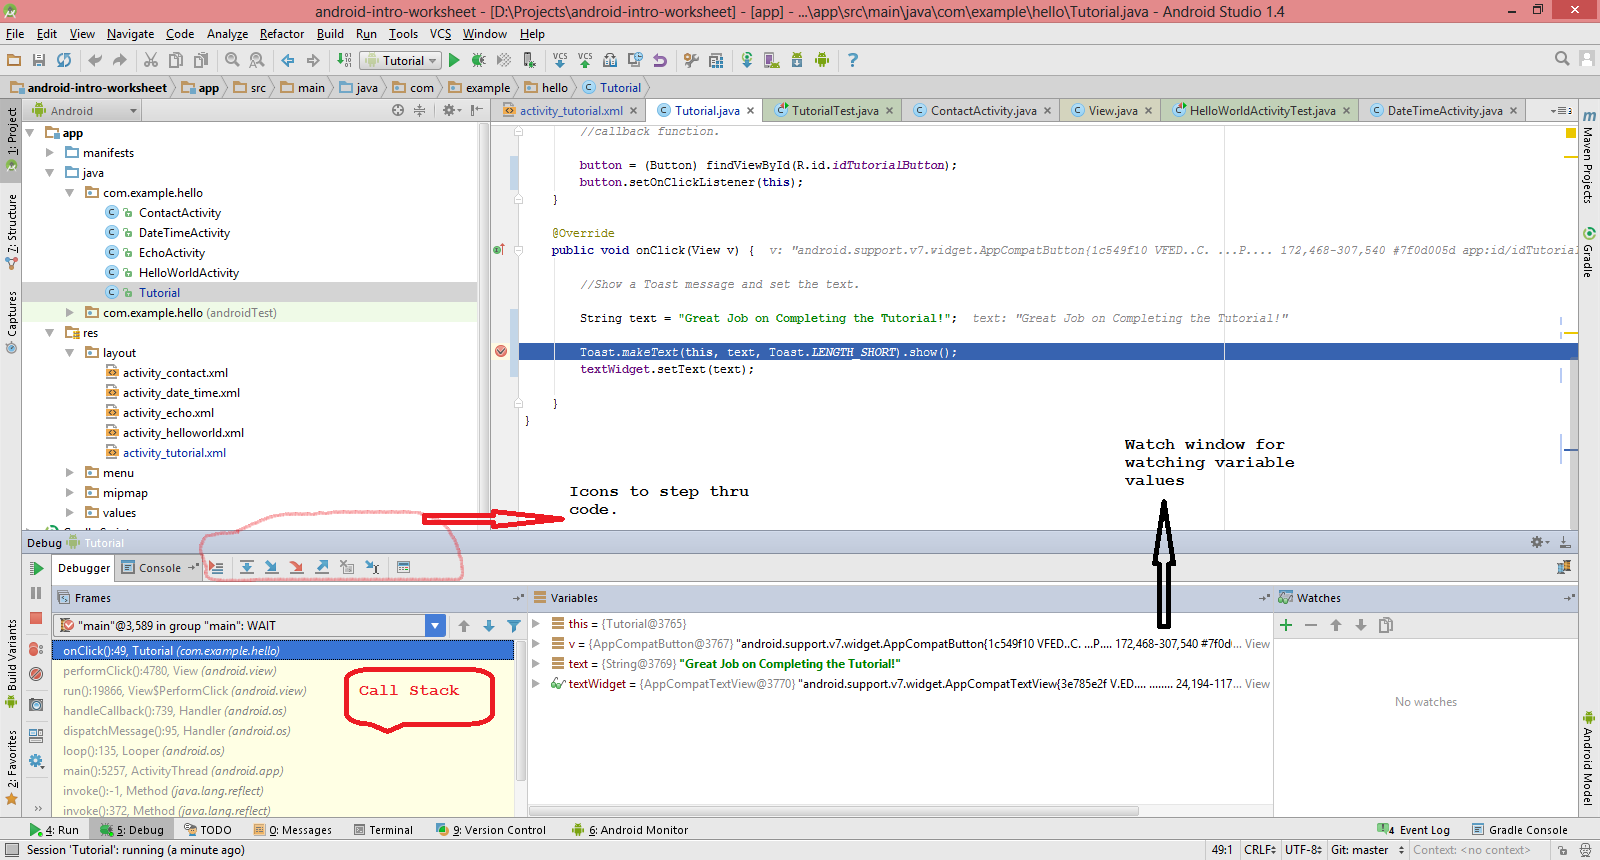
Once the debugger stops at the breakpoint you've set, you can inspect local variables, see the call stack and step through your code as shown below.
Debugging with Android Studio has more info on how to debug apps in android studio.
Now that you are done with the Tutorial, Here are the activities you will work through in this project.
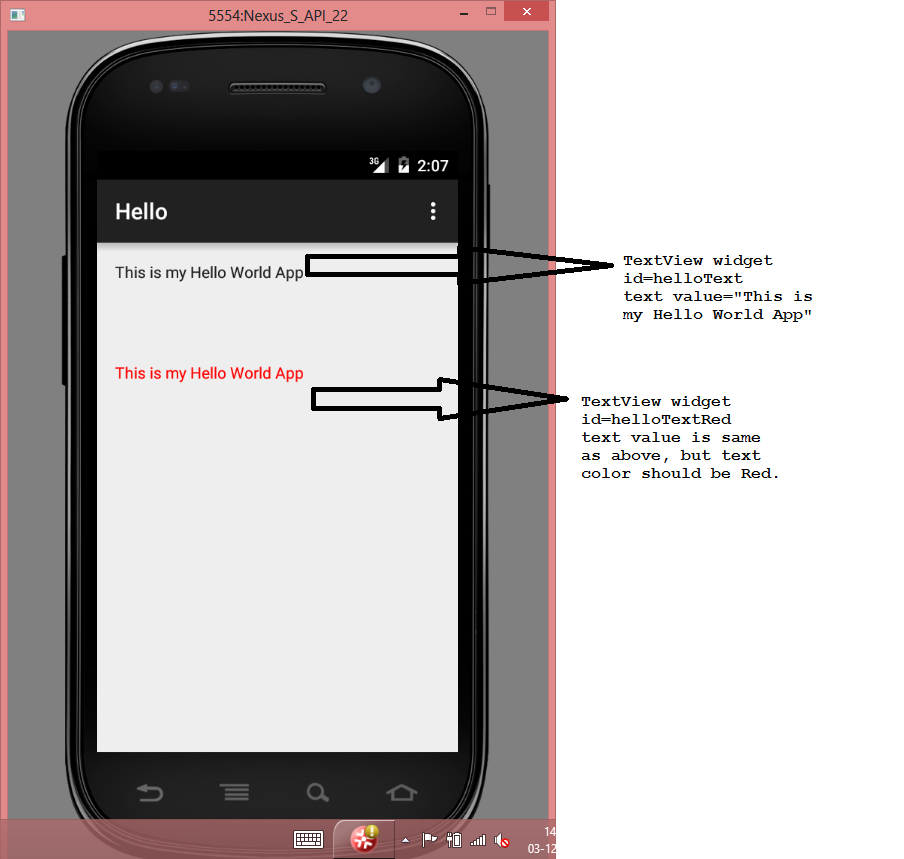
In this activity, you will build an app with the following screen. The app shows 2 TextView widgets each with the text: "This is my Hello World App". One of the widgets uses a larger text size (size = 33) as shown below.
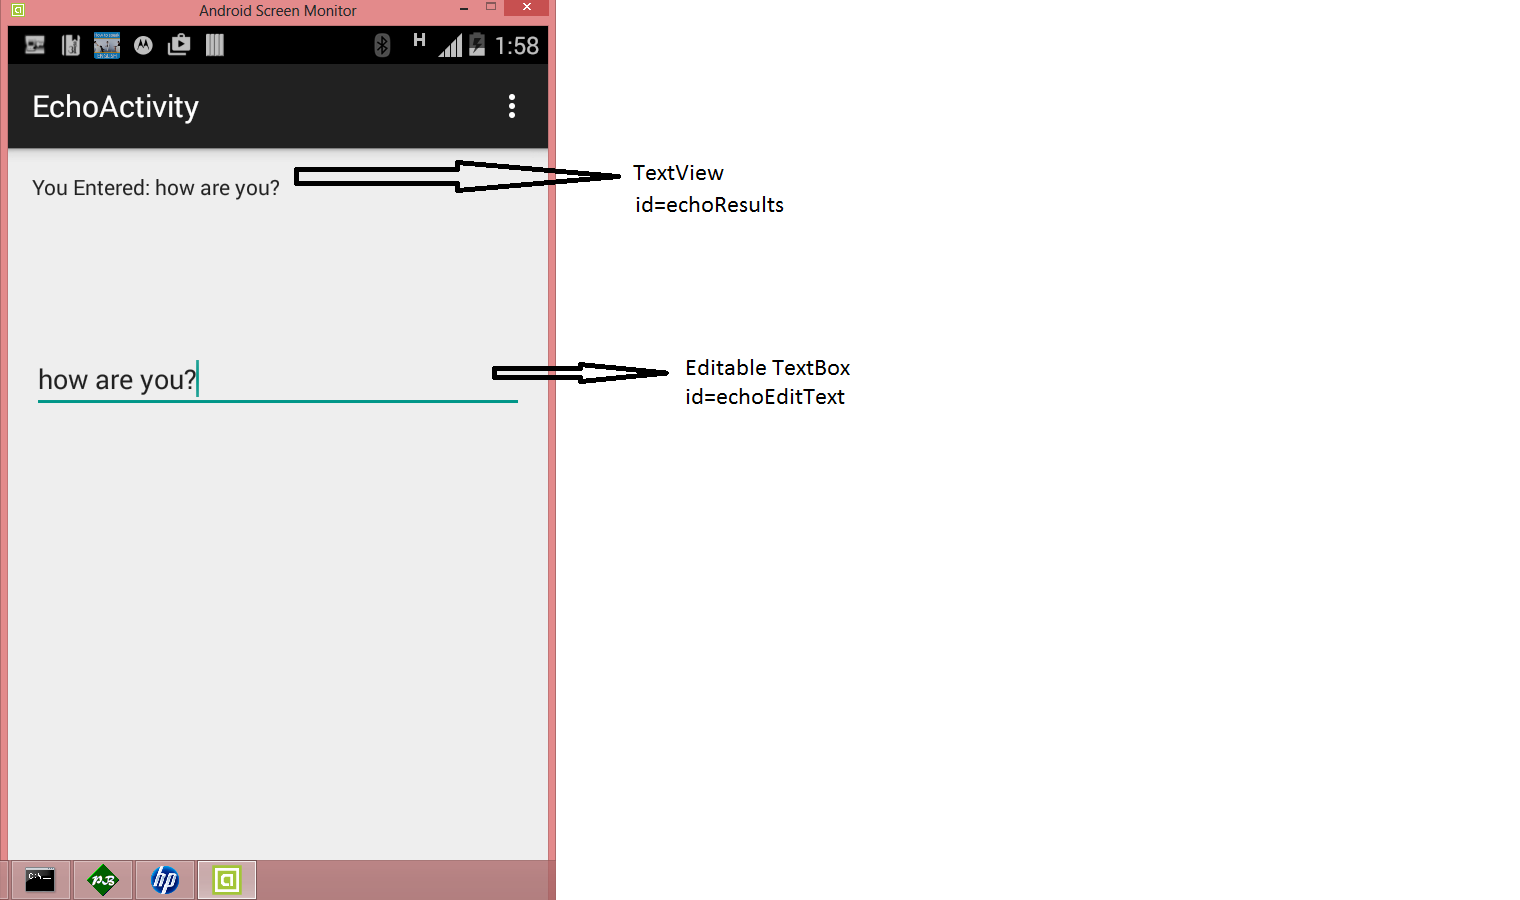
In this activity, you will build an app with the following screen. As text is entered into the EditText widget (id=echoEditText), it is displayed in the textview widget (id=echoResults) as shown below.
You will learn about TextBox Widget as well as implementing TextChangedListener
You will build a contact form app as shown below for this step.
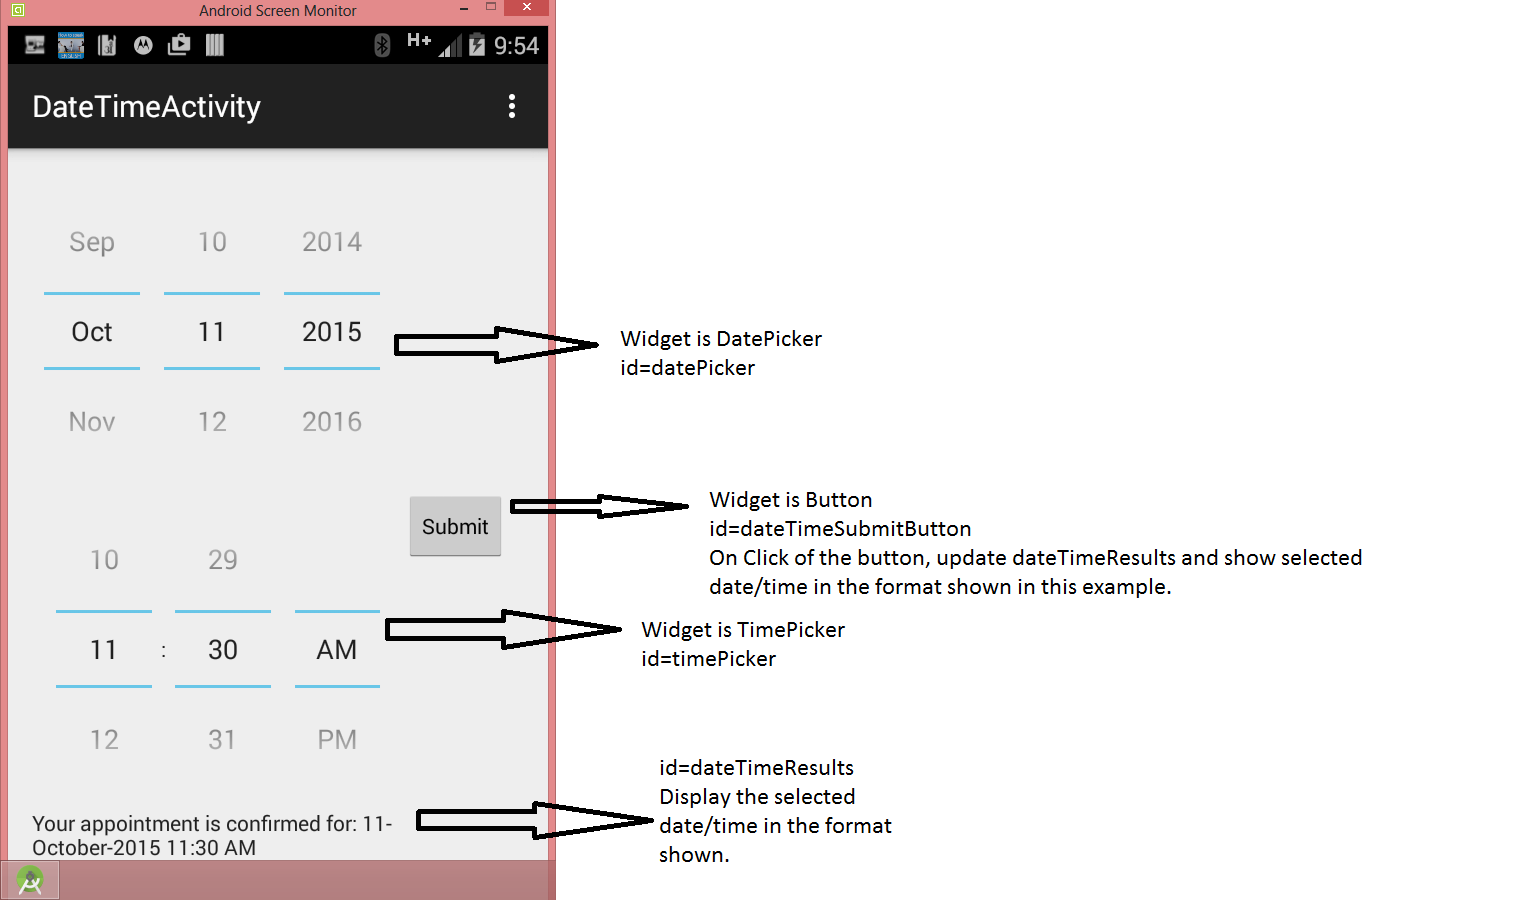
You will build an appointment taking app with the following screen. You app will have a DatePicker widget, TimePicker widget and a submit button that the user clicks after selecting date/time. You will have to show the selected date time in the dateTimeResults textview widget in the specified format (Example: "Your appointment is confirmed for: 11-October-2016 11:30 AM" )